How to Compare Materials and Finishes Before Ordering
Compare materials, finishes, assembly and packing before ordering, using real LANCE basin and artificial-tree inspection photos and a buyer checklist.
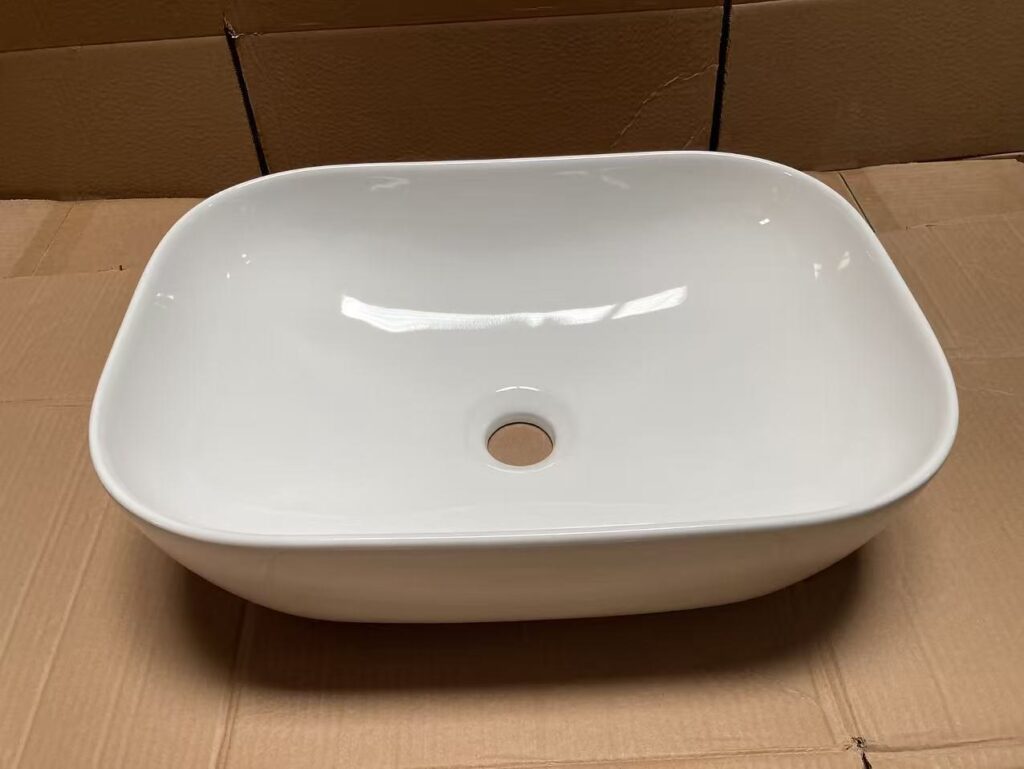
Before you look at price, compare four things: the written material and finish specification, the approved physical sample, construction details you can observe directly, and the protective packaging. Price only becomes meaningful once you know what each supplier is actually quoting. The examples below use LANCE’s MA100 washbasin and MA140 artificial-tree inspection photographs to show what to check and what evidence to retain.
What to Specify Before You Compare Anything
A supplier label or a product name is not a specification. Two similar-looking samples may differ in material, finish, construction or packing. Confirm those differences before deciding whether the prices are comparable; commercial terms and quantities can also affect a quotation.
For every product, agree on four separate layers of specification:
- Material identity: What the item is made from—not a brand name or a category word, but a description specific enough that a factory and an inspector can both check it. For a fabric, that means weave type, weight, and composition confirmed in writing, not just a swatch label. An archived LANCE initial inspection report retained fabric samples labelled AB014 Satin cloth and AB015 600D Oxford cloth, with a note that final factory confirmation was still needed. Those labels were a starting point, not a complete specification. Composition, construction, finish, color, and any required performance still needed to be agreed separately before production.
- Surface appearance: Gloss level, color reference, texture, and the acceptable range of minor variation—documented against a physical reference, not a digital image.
- Construction and dimensions: Key dimensions, material thickness where relevant, joint method, hardware, assembly requirements, and agreed tolerances for the product.
- Packing: Inner protection, carton specification and labeling. A finish approved on the sample still needs appropriate protection during handling and transport.
Photographs document appearance at one moment under one set of lighting conditions. They cannot establish material composition or durability. A photograph of a measurement is supporting evidence; it still needs a readable result, an agreed dimension and a recorded tolerance. Keep that distinction clear throughout your comparison process.
Worked Example: Glossy White Countertop Basin (MA100)
The MA100 photographs show a glossy white countertop washbasin from several angles, along with marked surface details and packing. They illustrate why a whole-product view should be followed by close checks.
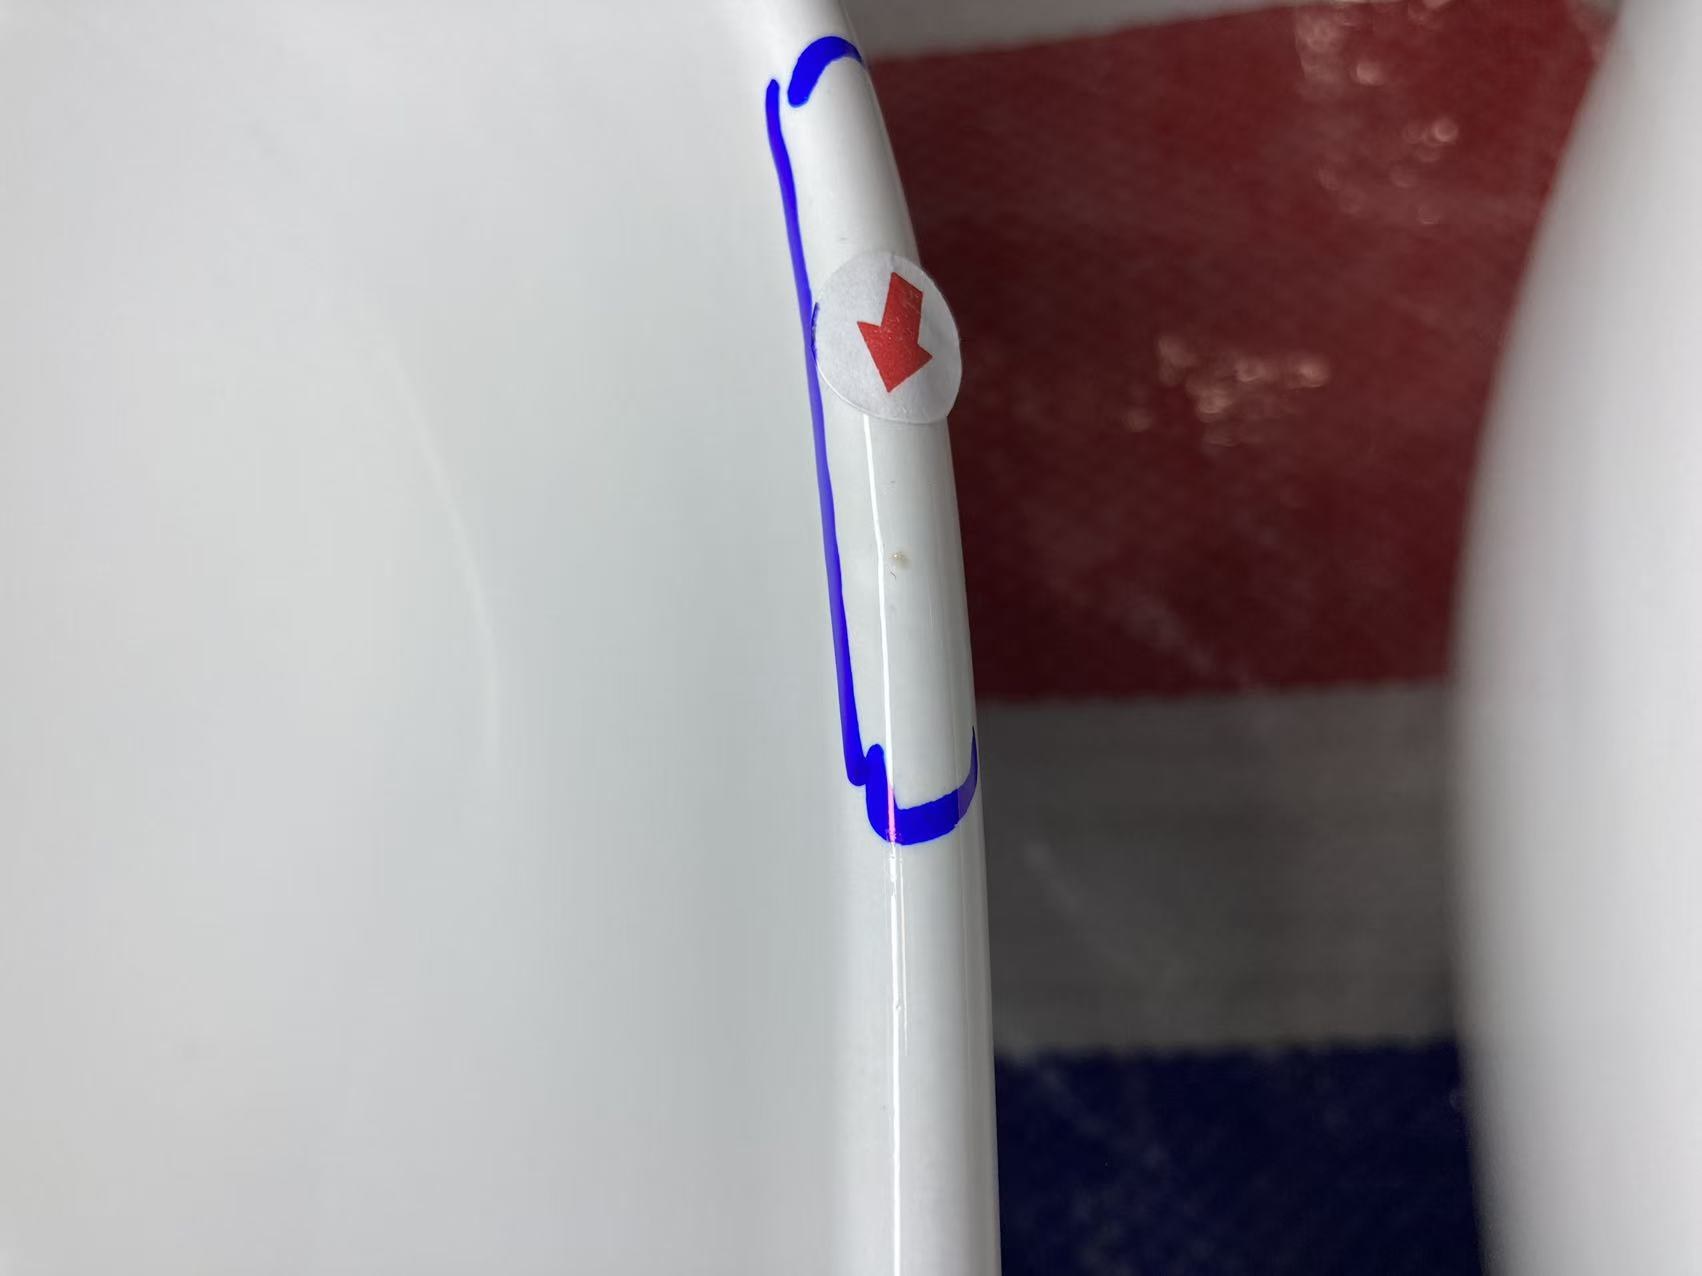
Start at the rim. Compare samples under the same even lighting, then change the viewing angle to check reflections along the full perimeter. Avoid comparing one sample in glare with another in shade. You are looking for smoothness of the glaze line, consistency of gloss level, and whether any surface irregularity is a residue that can be removed by an approved cleaning method or a persistent surface condition that cannot. Those are different problems with different implications. Ask the supplier to demonstrate cleaning using the approved method and record whether the mark remains. The supplied photograph alone does not establish whether a mark can be removed.
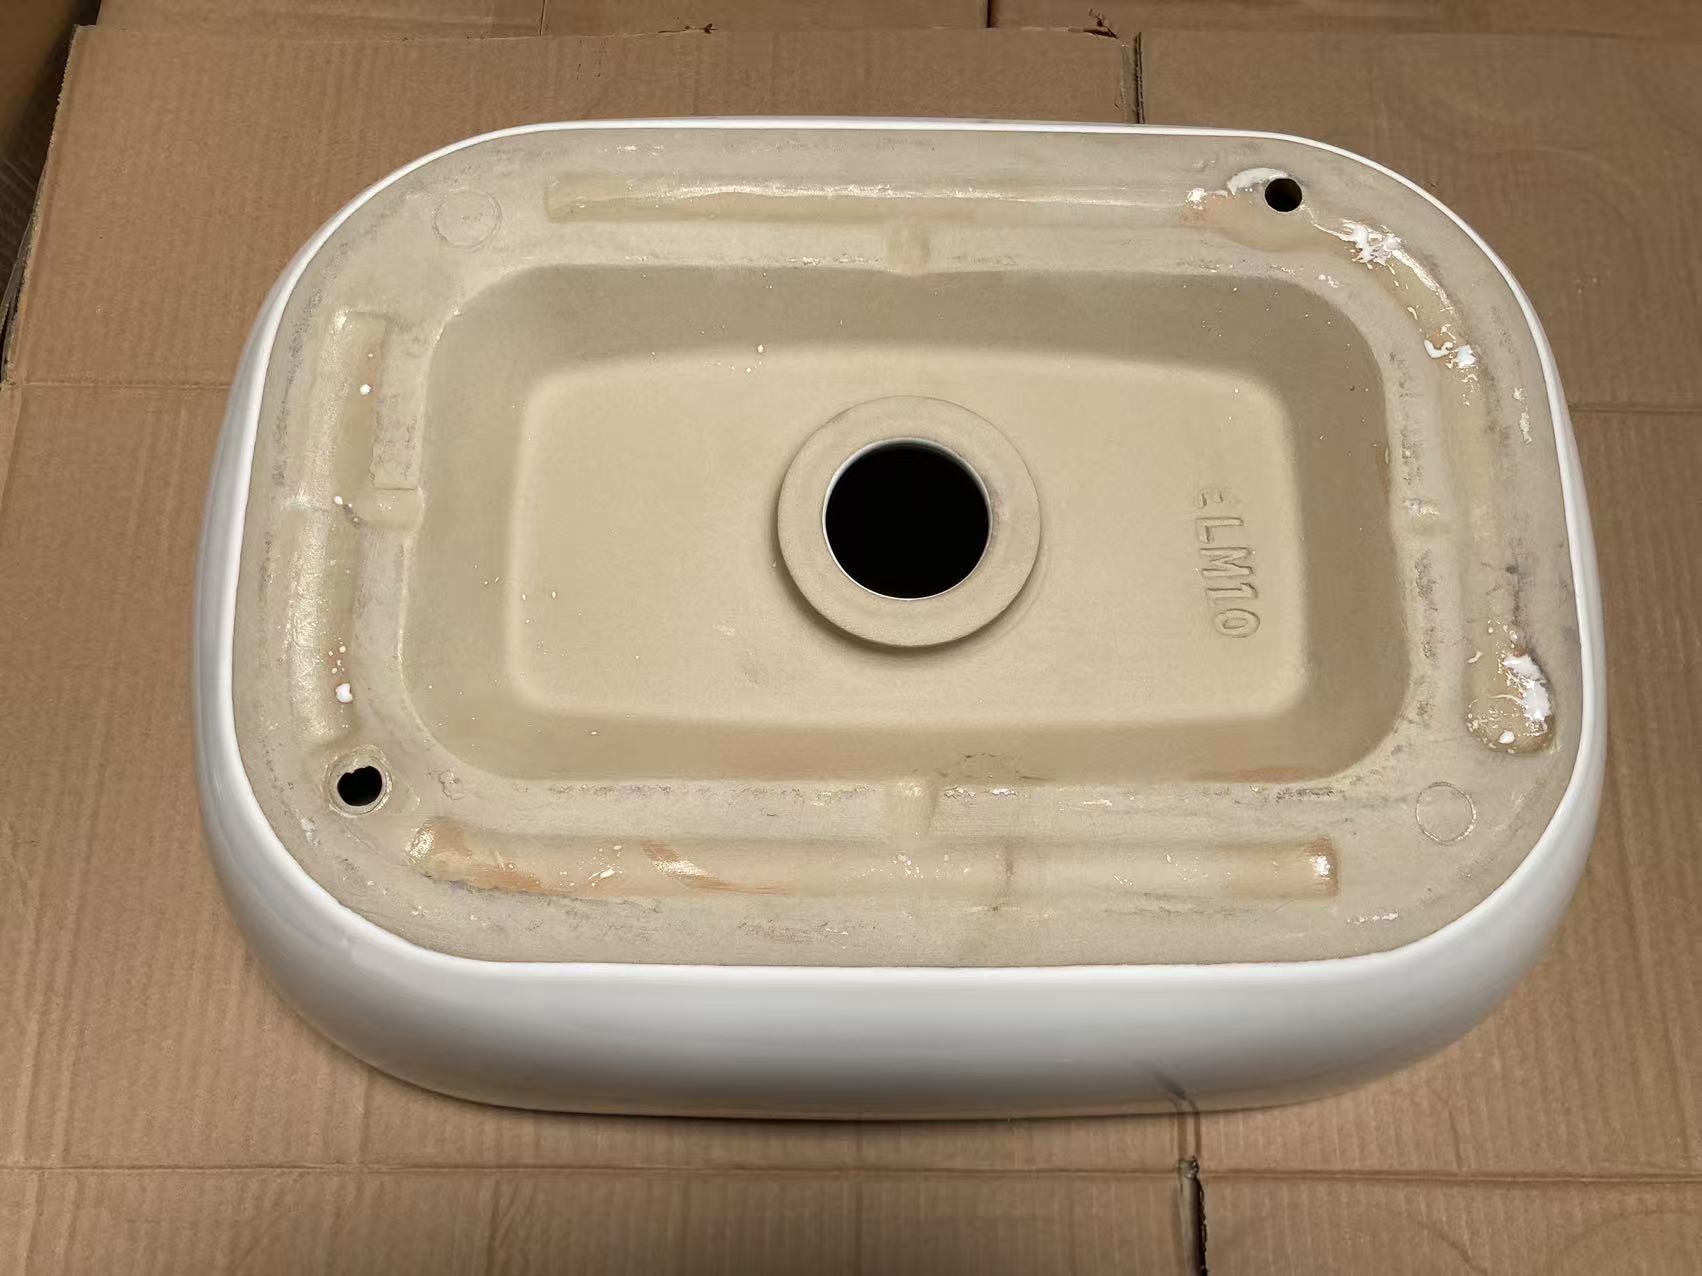
Turn the basin over and compare the underside with the approved sample and installation drawing. Check the intended contact areas, drain opening and any projections that could interfere with installation. Some areas may intentionally be unglazed; an underside with a different finish is not automatically a defect. Record deviations from the agreed design instead of judging the whole product by gloss alone.
Check the drain opening against the agreed edge finish and fitting dimensions. Record actual measurements with a suitable instrument, the specified values and any deviations. Keep readable measurement photographs as supporting evidence; do not copy a photographed dimension into a new order without confirming that it is the intended specification.
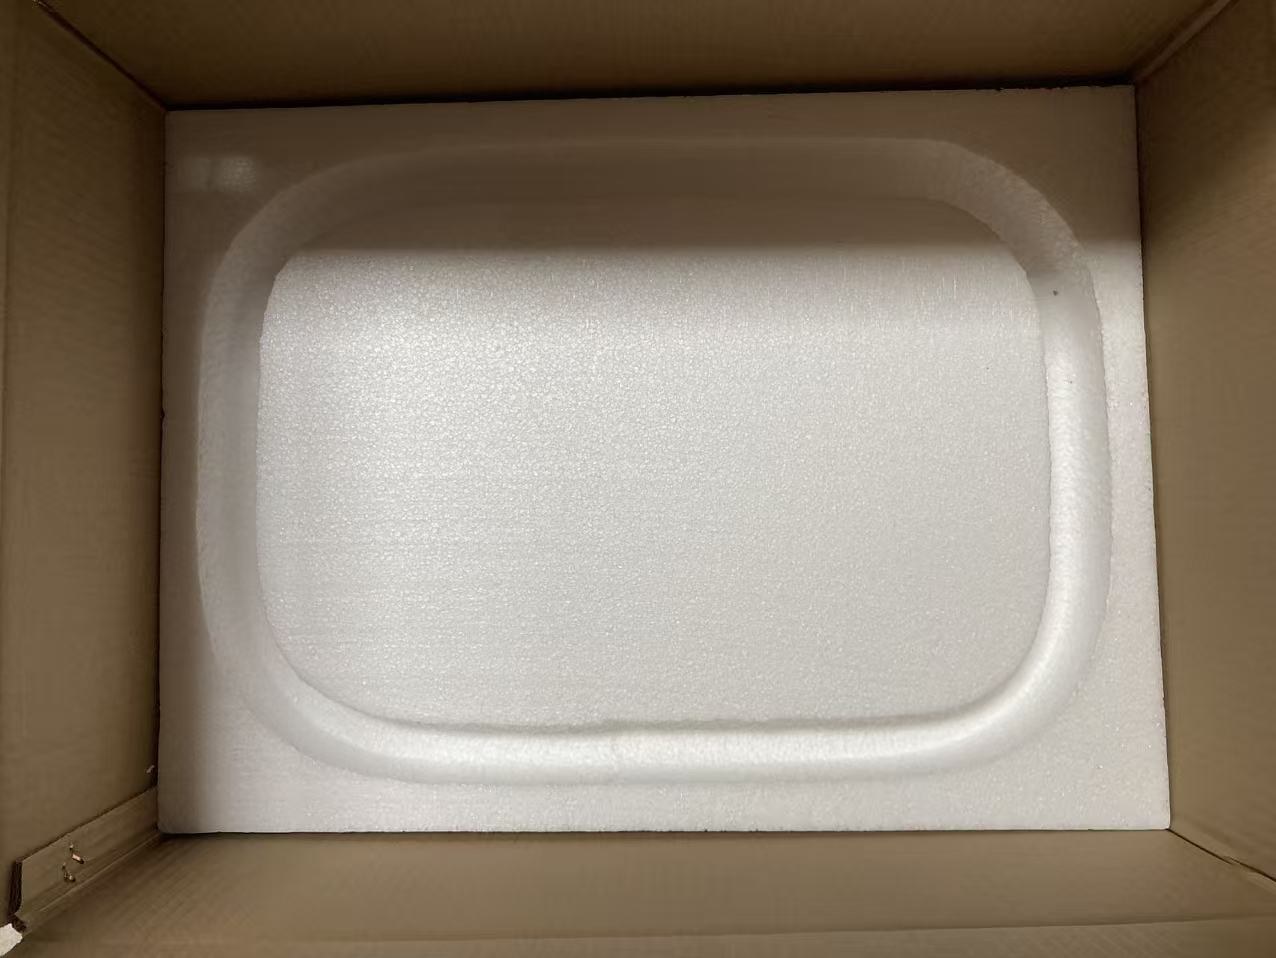
Finally, inspect the packing. The MA100 set includes a shaped foam insert inside the carton. Check how the packing locates the basin and protects its rim and contact surfaces. Movement, rubbing or hard contact inside a pack should be reviewed against the approved packing design; a photograph of foam alone cannot demonstrate transport performance.
The MA100 inspection photograph set includes images labelled to identify glaze-repair imperfections and glaze-surface imperfections as minor in that specific inspection, and another identifying dirt. Those are the classifications recorded in this source set, not universal acceptance rules. Whether a given surface condition is acceptable in your order depends on the defect limits you have agreed with your supplier in writing before production begins.
Worked Example: Artificial Decorative Tree (MA140)
An artificial decorative tree with olive-style foliage, a white pot, and separate branches introduces a different set of comparison checkpoints: assembly fit, color consistency across components, and the quality of surfaces that are visible from multiple angles.
Inspect the leaf surfaces on both sides. Compare the color, texture and edge appearance with the approved sample. View the assembled foliage from above and below, since leaf backs and attachment points may be visible from normal display angles. These are comparison points, not defects established by the photographs.
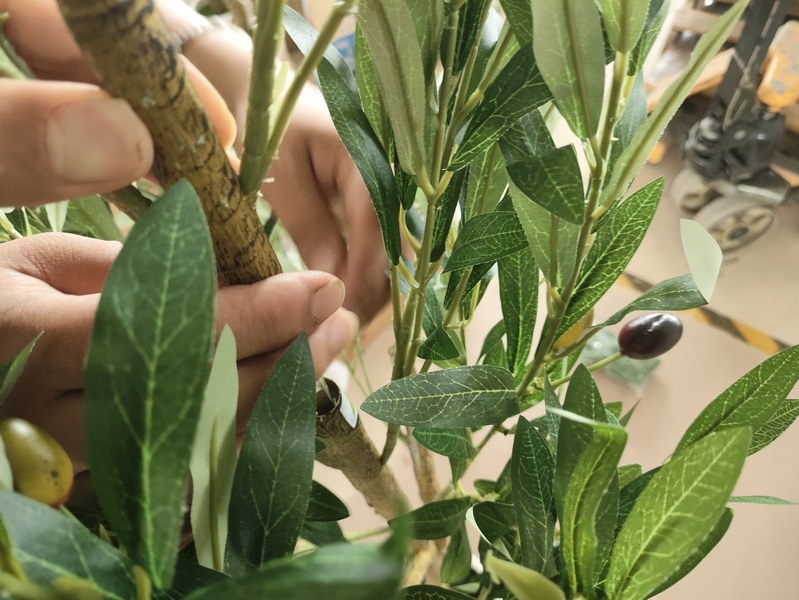
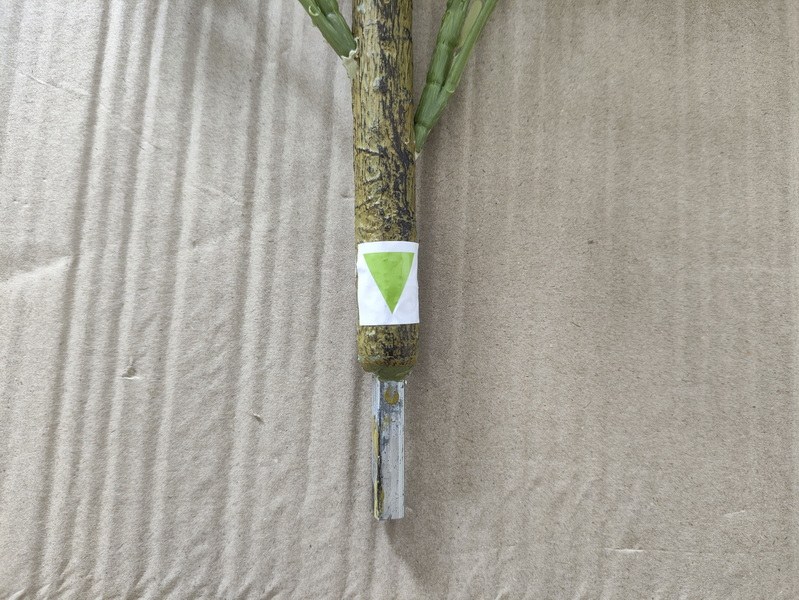
Check branch insertion points. Follow the supplied assembly instructions and compare pin/socket fit with the approved sample and agreed criteria. Color-matching assembly markers help ensure branches go into the correct positions; confirm that the markers on your sample are clear and that the fit is consistent across all joints, not just the first one you try.
Examine the pot finish under consistent light. Look at the rim, the exterior surface, and the base. The MA140 underside photographs show four pads. Compare their presence and placement with the approved design, and check whether the assembled pot sits as intended on a suitable flat surface. Record any rocking for review rather than assuming that the pictured sample failed.
Assembly should follow the supplier’s instructions. Do not improvise assembly sequences to test fit—an incorrect assembly can create apparent fit problems that do not exist in correct assembly, and can damage components.
The MA140 inspection photograph set shows leaf face and texture, branch joints, and pot components. These are checkpoints for visual comparison against your approved sample. The photographs do not identify the polymer, fiber, or trunk material composition, and make no claims about UV resistance, flame behavior, weather suitability, load capacity, or pull-test results. If your intended use requires evidence on any of those points, request the relevant test documentation separately and specifically.
What Inspection Reports Add to Your Comparison
An inspection report records what an inspector observed on a specific batch, against specific agreed criteria, on a specific date. Used correctly, it adds three things to your comparison process that photographs alone cannot provide.
First, it records defect classification against agreed criteria. An archived LANCE pre-shipment inspection report for a bookend product classified Corner Damage and Bubble as major defects, and OPP bag broken and Color Card Missed as minor. In the MA100 inspection file, glaze-surface imperfections were labelled minor. These are different products and different recorded conditions; they should not be treated as equivalent defects. The examples show why the defect description, location and acceptance criteria must accompany a severity label. When you compare suppliers, confirm that your defect classification table is agreed in writing before inspection, not interpreted afterward.
Second, a report records what reference was used. The LANCE pre-shipment report noted an approved blue reference sample retained before production, with dimensions and thickness checks against that reference. A retained sample gives inspectors a physical appearance reference alongside the specification, drawings and measurements.
Third, a report records packing condition at the point of inspection. The LANCE container loading report records package condition, container checks, staged loading, and seal. That record connects finish protection to packaging through the point of dispatch. It is not a guarantee of transit outcome, but it documents the condition at handover. See From Warehouse to Container for more on that stage. For a fuller walkthrough of what a useful inspection report should contain, see What an Inspection Report Should Show.
Comparison Checklist
Use the same checklist for each supplier, recording the differences beside that supplier’s quote. Adapt the checks to the product and intended use.
| What to agree | What to compare | Record to keep |
|---|---|---|
| Material identity | Written composition and construction; declared sample-to-production differences. | Supplier confirmation and the relevant evidence. |
| Finish reference | Color, gloss, texture, edges and hidden surfaces under consistent light. | Approved sample and annotated finish limits. |
| Dimensions and construction | Actual measurements, joints and contact areas against agreed tolerances. | Specification, measurement record and clear photos. |
| Assembly | Component fit, markers and completed assembly following the instructions. | Instructions and notes on fit or missing components. |
| Packing | Inner support, protected surfaces and carton against the packing sample. | Approved packing specification and photographs. |
| Performance evidence | Documented results relevant to intended use and the quoted product. | Applicable test reports and unresolved evidence gaps. |
Sample Approval and Supplier Quote Alignment
LANCE’s brochure places sample selection and order confirmation before warehouse collection, inspection and shipping; its custom-product workflow also includes drawings and a final sample. Use that sequence to settle the specification before the order moves forward.
Tie the approved sample to a versioned specification document. When you approve a sample, record the version number of the specification it was approved against, the date, and the name of the person authorizing approval on your side. Label and protect the physical sample so it remains available for finished-goods comparison.
Your approval record should include five elements: the versioned specification, the approved reference sample, an annotated defect limit document that distinguishes major from minor conditions for this specific product, a packing sample or detailed packing specification, and a named signoff from both buyer and supplier. Any substitution of material, finish, or packing after approval should trigger a formal review, not an informal agreement.
Buyer approval of a sample does not substitute for any safety or regulatory testing that your intended market or use requires. Those are separate obligations.
When you request quotes from multiple suppliers, ask each one to quote against the same written specification and packing basis. A lower price that reflects a thinner wall, a different finish process, or reduced inner packing is not a comparable quote—it is a different product. Ask suppliers to list any proposed alternative separately, with its specification, price and lead time. Keep the order quantity and commercial basis consistent when comparing quotations.
Frequently Asked Questions
Can I use photographs to confirm material composition?
No. Photographs document surface appearance at one moment under one lighting condition. They cannot identify what a material is made from, confirm its internal construction, or prove how it will perform in use. Use photographs to document appearance for comparison purposes, and request written material confirmation and, where needed, test documentation separately.
If a defect is labelled minor in an inspection report, does that mean I should accept it?
Not automatically. Minor and major classifications in an inspection report reflect the agreed criteria for that specific product and inspection. A condition labelled minor in one report may be classified differently under a different agreed standard, or may be unacceptable to your end customer regardless of classification. Review defect classifications against your own agreed criteria and your intended use before making an acceptance decision.
How do I compare two supplier samples fairly when they look similar?
Place both samples under the same consistent light source and compare them from the same viewing angles. Check edges, undersides, seams, and joints on both, not just the primary display face. Measure both against your written specification using the same instrument. Document what you observe in writing and in photographs taken under the same conditions. Differences that are invisible in a quick side-by-side comparison often become clear when you work through a structured checklist.
When should I request formal test evidence from a supplier?
When your intended use creates a specific performance requirement that cannot be assessed by visual inspection or measurement alone. Identify those requirements before you request samples, so that suppliers know what evidence to prepare. Check that any report provided applies to the relevant material, product or finish and the performance being claimed. Missing evidence should remain an open item in the approval record.
Sources
The worked examples in this guide draw on the MA100 basin inspection photograph set and the MA140 artificial tree inspection photograph set, which document visual checkpoints observed at the time of inspection. Additional context comes from archived LANCE initial inspection and pre-shipment inspection reports covering separate products, and a LANCE container loading report. These records come from separate inspections and orders; observations in photographs are not laboratory test results. Workflow context references the LANCE sourcing and inspection brochure.
Work Through Your Comparison With LANCE
If you are comparing supplier samples in Yiwu and want to structure your material and finish review before committing to an order, LANCE can help you define the right checkpoints for your specific product. Contact us with your product photos, material and finish requirements, order quantity, and intended use, and we will discuss the appropriate sample comparison and inspection scope for your situation.

Gary
10+ years of experience in supplier management, sharing practical insights on supplier selection and sourcing relationships.


